š Nilesat The Leading Satellite in the Arab World
Nilesat is one of the most important communication satellites in the Middle East and North Africa (MENA) region. Since its launch in 1998, it has become the backbone of satellite broadcasting in the region, offering a wide range of services including television, radio, and internet. Known for its extensive coverage and reliability, Nilesat plays a crucial role in connecting millions of viewers, businesses, and institutions across the Arab world.
š On the subject of Nilesat
Nilesat, operated by the Egyptian company Nilesat Satellite Communications, provides satellite broadcasting services to a wide range of customers across the Middle East, North Africa, and parts of Europe. The satellite allows for the transmission of television and radio signals, as well as data and internet services.
Nilesat’s fleet of satellites serves multiple purposes:
-
Broadcasting TV channels: Free-to-air and subscription-based channels.
-
Radio broadcasting: National and regional radio stations.
-
Data services: Internet access and other telecommunication services.
-
Corporate communications: For businesses and institutions requiring dedicated communication lines.
With several satellites in orbit, including Nilesat 101, Nilesat 102, and the more recent Nilesat 201, the network continues to grow in capacity and service offerings.
š Nilesatās Satellite Fleet
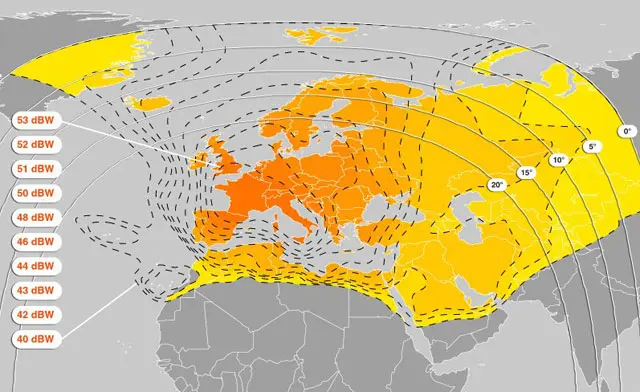
Nilesat operates a fleet of geostationary satellites positioned to serve the MENA region and beyond. These satellites are carefully positioned to provide the best possible signal coverage. Key satellites in the fleet include:
-
Nilesat 101
-
Nilesat 102
-
Nilesat 201
-
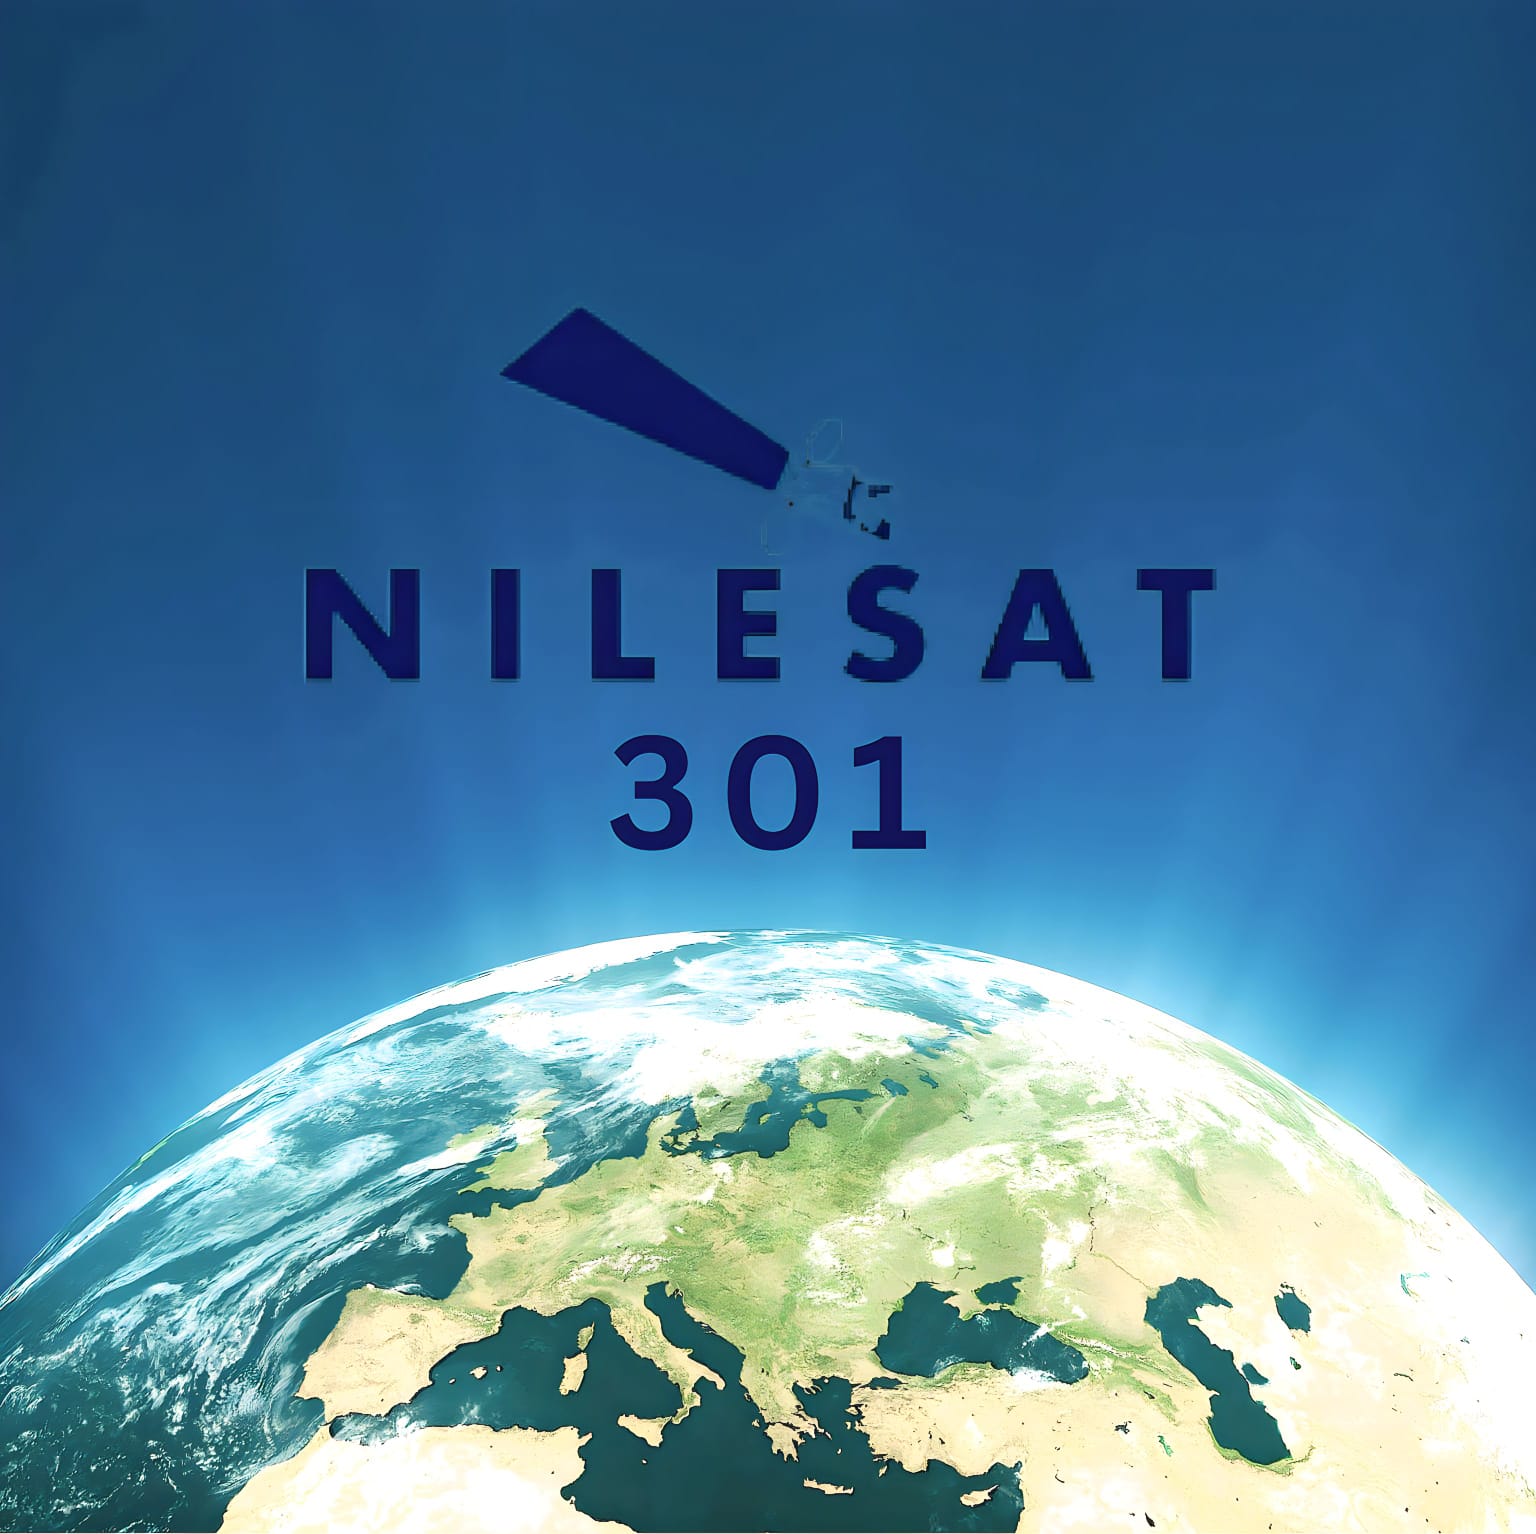
Nilesat 301 (upcoming)
These satellites are strategically placed to ensure seamless coverage for broadcasting TV channels, radio stations, and other telecommunication services.
š°ļø Frequencies and Services on Nilesat
Nilesat operates across various frequency bands, including the C-band and Ku-band. These frequencies are used for various services:
-
C-band: Primarily used for long-range communication and broadcasting, C-band offers a stable signal with less interference from weather conditions. It’s commonly used for television broadcasting.
-
Ku-band: This band is widely used for satellite TV broadcasting and internet services. The Ku-band offers higher capacity and smaller antennas, making it ideal for both residential and commercial use.
Nilesat also provides a variety of frequency ranges that enable users to access a broad array of channels and services. Users looking to set up satellite systems can find detailed guides to help them tune in to the correct frequencies.
š” How to Receive Nilesat Signals
To access Nilesatās satellite signals, users need a satellite dish and a receiver that supports the appropriate frequency bands (C-band or Ku-band).
The dish must be correctly aligned with the satelliteās orbital position for optimal signal reception. Once the dish is set up, users can enter the corresponding frequency in their receiver to access the desired channels.
Common Nilesat Frequencies:
-
Nilesat 101/102 Frequency:
-
Frequency: 11.977 GHz (Vertical)
-
Symbol Rate: 27500
-
FEC: 3/4
-
-
Nilesat 201 Frequency:
-
Frequency: 12.515 GHz (Horizontal)
-
Symbol Rate: 27500
-
FEC: 3/4
-
Users can access various TV channels, radio stations, and data services on these frequencies.
For easy access to these frequencies and satellite configurations, FreqSatellite is a reliable platform offering up-to-date information on Nilesatās channels, frequencies, and settings.
Nilesat remains a vital asset for satellite communications and broadcasting in the Arab world.
With its broad coverage, extensive services, and reliable signal quality, it is a key player in delivering television, radio, and internet services to millions of people in the MENA region.
Whether youāre looking to set up a satellite system for personal or commercial use, Nilesat continues to provide top-notch services. For more information on frequencies and satellite settings, FreqSatellite offers the most comprehensive and current satellite guides.
How to Identify New Satellite Frequencies Before Scanning
Staying updated with the latest satellite frequencies allows users to efficiently find and tune new channels without wasting time on trial-and-error scans. Knowing where to look ensures a smoother and faster channel setup.
1. Follow Reliable Satellite Websites
- Use trusted sources that regularly publish updated frequency lists for various satellites.
- Check for details such as frequency, polarization, symbol rate, and FEC for accuracy.
- Subscribe to newsletters or feeds from satellite providers for real-time updates.
2. Use Satellite Receiver Tools
- Many modern receivers include tools or apps to automatically fetch new transponder data.
- Enable features like āChannel Updateā or āAuto Transponder Scanā for automatic detection.
- Keep your receiver firmware up to date to support these features.
3. Monitor Official Broadcaster Announcements
- Follow official channels or social media accounts of broadcasters for announcements of new channels.
- Note down the frequency and other parameters as soon as they are published.
4. Use Satellite Tracking Apps
- Satellite tracking apps help identify which satellites are active in your region.
- They often provide real-time frequency updates and footprints for better planning.
5. Keep a Personal Frequency Log
- Maintain a record of new frequencies you discover or plan to scan.
- Update the log regularly to avoid scanning the same frequencies repeatedly.
- This helps you quickly access new channels as they become available.
By proactively identifying new satellite frequencies, users can save time, avoid missing new channels, and maintain a complete and up-to-date channel lineup.
How to Efficiently Identify and Tune New Satellite Channels
Satellite channels are frequently added, updated, or moved to new frequencies. To ensure you never miss new broadcasts, it is important to know how to efficiently detect and tune newly launched channels using the correct scanning methods and proper receiver settings.
1. Verify the Latest Frequency Information
- Always check updated frequency, polarization, and symbol rate details from reliable satellite sources.
- Confirm the satellite orbital position (e.g., 7°W, 13°E) before scanning.
- Incorrect parameters are the most common reason new channels are not detected.
2. Select the Appropriate Scanning Method
- Manual Scan: Ideal when you have specific transponder details for a new channel.
- Blind Scan: Automatically searches all active frequencies to discover newly added channels.
- Network Scan (if available) can detect additional related transponders.
3. Optimize Dish Alignment for Weak New Signals
- New channels sometimes broadcast with lower power during testing phases.
- Fine-tune azimuth and elevation for maximum signal quality.
- Adjust LNB skew slightly to improve signal reception.
4. Update Receiver Firmware
- Ensure your receiver software supports new compression standards like DVB-S2 and HEVC.
- Firmware updates improve compatibility with recently activated transponders.
- Restart the receiver after updates before scanning again.
5. Organize and Manage New Channels
- Sort newly found channels into favorites lists for easy access.
- Delete duplicate or inactive channels after scanning.
- Rename test channels if needed for better organization.
6. Troubleshooting if Channels Do Not Appear
- Recheck frequency details for accuracy.
- Confirm signal quality is stable above acceptable levels.
- Inspect cables and LNB connections if scanning fails repeatedly.
By combining updated frequency data, proper dish alignment, and the correct scan method, users can efficiently detect and tune new satellite channels while maintaining a clean and organized channel list.
Setting Your Receiver to Automatically Follow New Channels
Modern satellite receivers allow automatic updates of the channel list without manually scanning each frequency. This ensures you always access new channels and maintain a complete, organized lineup.
1. Enable Auto-Update Features
- Go to your receiverās Settings or System menu.
- Look for options like Auto Channel Update, Network Scan, or Channel Refresh.
- Turn on the feature to allow the receiver to check for new channels automatically at scheduled times.
2. Connect to the Satellite or Network
- Some receivers require connection to the satellite network or an internet feed for automatic updates.
- Ensure your receiver is online if the feature relies on network-based updates.
3. Schedule Update Times
- Set the update to occur at convenient times, such as overnight, to avoid interrupting viewing.
- Choose daily, weekly, or event-based update intervals if available.
4. Keep Receiver Firmware Updated
- Maintain the latest firmware to support automatic channel updates.
- Check manufacturer notifications to ensure compatibility with the latest transponder changes.
5. Verify Updated Channels
- After auto-update, review your channel list to ensure new channels are added correctly.
- Organize favorites and remove duplicates or inactive channels if necessary.
Enabling automatic channel updates saves time, ensures you never miss newly launched channels, and keeps your receiverās lineup complete and organized without manual effort.
How Satellites Enable Global Live Sports Broadcasting
Satellite technology is the backbone of global live sports broadcasting. It allows major sporting eventsāsuch as the
FIFA World Cup and the Olympic Gamesāto be transmitted in real time to millions of viewers across continents with high reliability and quality.
1. Capturing the Live Event
- Multiple professional cameras capture the action from different angles inside the stadium.
- Audio commentary, instant replays, and on-screen graphics are added in a production control room.
- The final video feed is encoded into a compressed digital format suitable for satellite transmission.
2. Uplink Transmission to the Satellite
- The encoded broadcast signal is sent from a ground station (uplink facility) to a geostationary satellite in orbit.
- The satellite receives, amplifies, and shifts the frequency of the signal.
- High-powered transponders ensure wide and stable coverage over large regions.
3. Downlink Distribution to Broadcasters and Viewers
- The satellite retransmits the signal back to Earth across its coverage footprint.
- TV networks receive the signal at their ground stations for redistribution via cable, terrestrial, or IPTV systems.
- Home satellite dishes receive the signal directly for live viewing.
4. Maintaining High Quality and Low Latency
- Advanced standards such as DVB-S2 and HEVC compression allow HD and 4K broadcasts with efficient bandwidth usage.
- Redundant satellite links prevent interruptions during critical live moments.
- Hybrid systems combine satellite and fiber networks to minimize broadcast delay.
5. Why Satellites Are Essential for Live Sports
- Global reach without relying on local infrastructure.
- Simultaneous transmission to multiple countries and languages.
- Reliable performance even in remote or disaster-affected areas.
In summary, satellites make worldwide live sports coverage possible by rapidly transmitting high-quality video signals from stadiums to broadcasters and viewers everywhere, ensuring fans never miss a single moment of the action.
How to Restore Channels After a Factory Reset
Performing a factory reset on your satellite receiver erases all saved channels, favorites, and settings. Restoring your channels correctly ensures you can continue enjoying your favorite content without starting from scratch.
1. Backup Before Reset
- If possible, always create a backup of your channel list and settings before performing a factory reset.
- Use a USB flash drive or the receiverās built-in backup feature.
- Store the backup file safely to prevent corruption or loss.
2. Perform the Factory Reset
- Access the Settings or System menu on your receiver.
- Select Factory Reset or Restore Default Settings.
- Confirm the action and wait until the reset is complete.
3. Restore Channels from Backup
- Connect your USB drive with the backup file to the receiver.
- Use the Restore or Import Channels option in the menu.
- Verify that all channels, favorites, and settings have been restored correctly.
4. Manual Channel Scan (If Backup Is Unavailable)
- Use the Auto Scan or Network Scan feature to search for available channels.
- For specific channels, perform a manual scan using the frequency, polarization, and symbol rate.
- Save the channels after scanning and organize your favorites as needed.
5. Verify Signal and Settings
- Check the signal strength and quality for each restored channel.
- Adjust dish alignment or LNB skew if necessary to improve reception.
- Ensure parental controls and other custom settings are reapplied.
By following these steps, you can quickly restore your channels after a factory reset, minimizing downtime and ensuring a seamless viewing experience.
How to Choose the Right Satellites for Watching Sports
Choosing the right satellite is essential for accessing sports channels and live broadcasts. The correct satellite ensures better coverage, higher signal quality, and access to regional or international sports networks.
1. Identify Your Favorite Sports Channels
- List the channels you want to watch (e.g., ESPN, beIN Sports, Sky Sports).
- Check which satellites these channels are broadcasting from.
- Focus on satellites with the widest coverage for your preferred channels.
2. Check Satellite Footprints
- Look at the satelliteās coverage map (footprint) to ensure strong reception in your location.
- Choose satellites with high signal strength for HD or 4K sports broadcasts.
- Consider satellites that cover multiple regions if you want international sports.
3. Consider Frequency and Transponder Details
- Verify the frequencies, polarization, and symbol rates used for sports channels.
- Satellites with stable and high-power transponders improve reception quality.
- Check for regular updates to frequencies for live sports events.
4. Evaluate Local Regulations and Availability
- Some sports channels may be restricted to certain regions or satellites.
- Choose satellites that legally broadcast the sports content you want.
- Ensure you have access to the required subscriptions if channels are encrypted.
5. Use Receiver Tools and Apps
- Modern receivers can suggest satellites based on channel preferences.
- Satellite tracking apps can help locate the best positions for sports broadcasts.
- Regularly update transponder lists for newly launched sports channels.
By selecting the right satellites, you ensure uninterrupted access to live sports, higher signal quality, and a comprehensive lineup of regional and international sports channels.
How to Backup and Restore Channel Lists on a Satellite Receiver
Creating a backup of your satellite receiverās channel list is essential to avoid losing your favorite channels after a factory reset, firmware update, or system malfunction. Most modern receivers allow users to export and restore channel data quickly using USB storage.
1. Why Backing Up Your Channel List Is Important
- Prevents loss of sorted and organized channel lists.
- Saves time by avoiding repeated manual scanning and sorting.
- Protects custom favorites groups and channel names.
2. How to Backup the Channel List
- Insert a formatted USB flash drive into the receiver.
- Go to the receiverās Tools or System menu.
- Select Backup or Dump to USB.
- Choose Channel List (or āUser Databaseā).
- Confirm and wait until the backup file is saved successfully.
3. How to Restore the Channel List
- Insert the USB drive containing the backup file.
- Open the Upgrade or Restore menu.
- Select Restore from USB or Load User Database.
- Choose the saved file and confirm the process.
- Restart the receiver after restoration is complete.
4. Important Tips Before Restoring
- Ensure the backup file matches your receiver model and firmware version.
- Avoid turning off the device during backup or restore.
- Keep multiple backups in case one file becomes corrupted.
5. Troubleshooting Common Issues
- If the file is not detected, check USB format (FAT32 is recommended).
- Update firmware if restore options are missing.
- Recreate the backup if the restore process fails.
Backing up and restoring your channel list ensures a smooth viewing experience and protects your personalized setup from unexpected data loss.


