Satellites

🌟 SuhailSat: Qatar’s Gateway to Advanced Satellite Communication

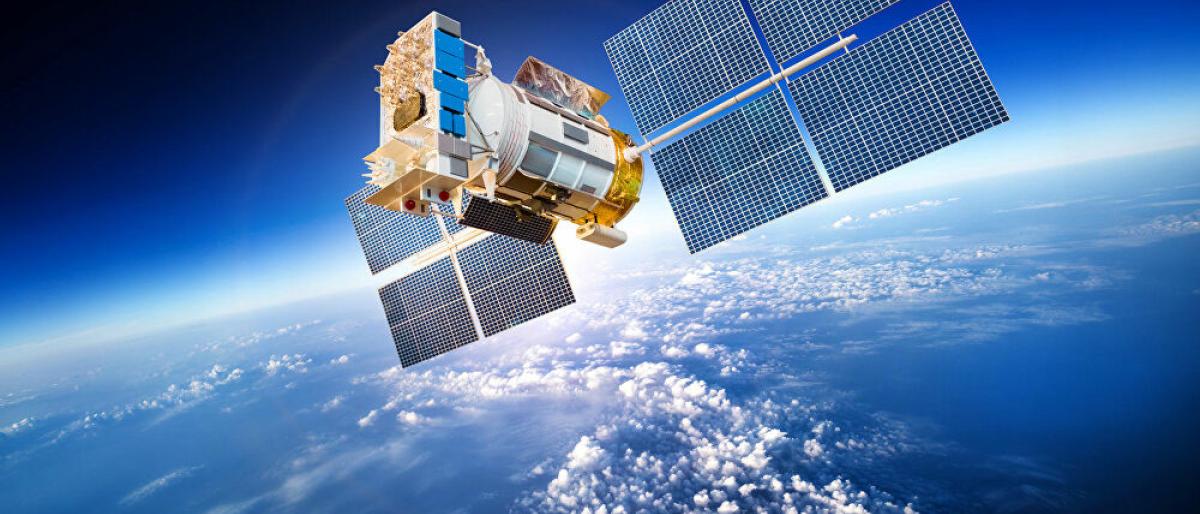
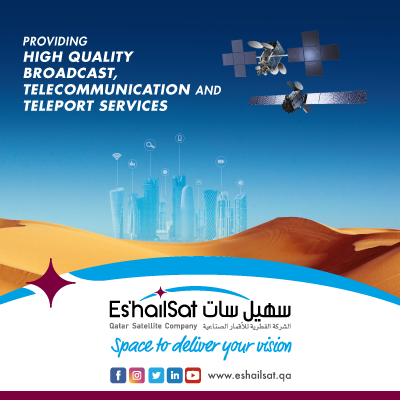
SuhailSat is Qatar’s flagship satellite, offering high-quality broadcasting and communication services across the Middle East, North Africa, and parts of Europe. Operated by Es’hailSat, the company founded in Doha, SuhailSat represents a major step in Qatar’s ambitions to become a leader in space technology and satellite broadcasting.

Launched to provide secure, reliable, and high-performance satellite services, SuhailSat supports television channels, broadband internet, and secure communications for both governmental and commercial clients.

šŸš€ On the subject of SuhailSat

The name SuhailSat is inspired by the Arabic name for the Canopus star (Suhail), one of the brightest stars in the sky, symbolizing clarity and excellence.

Currently, the SuhailSat program includes:

  • Es’hail-1 (launched in 2013)

  • Es’hail-2 (launched in 2018)

Both satellites are stationed at 25.5°/26.0° East orbital positions, which makes them ideal for coverage across the MENA region and parts of Europe.

šŸ›°ļø SuhailSat Features and Services

SuhailSat offers a wide range of services, including:

  • HD and 4K TV broadcasting: Delivering premium quality video services.

  • Secure communications: Especially important for governmental and military operations.

  • Broadband and internet services: Supporting businesses and ISPs across the region.

  • Media transmission: Used extensively by major TV networks for reliable and clear signals.

Notably, Al Jazeera Media Network and beIN Sports use SuhailSat for their broadcasting services.

šŸ“” How to Receive SuhailSat Signals

Receiving SuhailSat channels is easy if you have the proper satellite dish setup aligned towards the 25.5°/26.0° East orbital slot.

Common Reception Requirements:

  • Satellite Dish Size: 90 cm to 120 cm (depending on your region)

  • LNB: High-quality Universal LNB

  • Receiver: Compatible with DVB-S2, HD, or UHD standards

Example Frequencies:

  • 11270 V 27500 2/3 (HD channels)

  • 11642 H 27500 2/3 (News and entertainment)

For updated frequencies and detailed setup instructions, FreqSatellite provides the most accurate and latest satellite information.

🌐 SuhailSat Coverage

SuhailSat offers excellent coverage over:

  • Qatar

  • Arabian Gulf countries

  • North Africa

  • Levant region

  • Parts of Europe

Its powerful beams ensure a reliable and strong signal quality, even in remote areas.

SuhailSat stands as a symbol of technological innovation in Qatar, providing secure and high-quality satellite services to millions of viewers and businesses. Whether you’re tuning into your favorite TV channels, setting up broadband satellite internet, or managing secure communications, SuhailSat offers a reliable solution.
For full frequency lists, satellite settings, and the latest updates, visit FreqSatellite — your ultimate guide for satellite technology

Understanding the Difference Between Arabic and International Satellites

Satellite broadcasting varies depending on whether the satellite is regional (Arabic) or international. Understanding these differences helps viewers choose the right satellites for their preferred channels and optimize reception quality.

1. Coverage Area

  • Arabic Satellites: Primarily cover the Middle East and North Africa, offering regional channels and content.
  • International Satellites: Provide global coverage, including Europe, Asia, and the Americas.
  • Coverage maps (footprints) determine which regions receive strong signals from each satellite.

2. Channel Content

  • Arabic satellites focus on local news, entertainment, and regional sports channels.
  • International satellites broadcast a variety of content including global news, movies, sports, and multicultural programming.
  • Language and regional restrictions may affect channel availability.

3. Transponder and Frequency Management

  • Arabic satellites often have transponders dedicated to specific regional broadcasters.
  • International satellites manage multiple regions and languages, sometimes offering more transponders per satellite.
  • Frequency and polarization must be correctly selected for clear reception.

4. Accessibility and Subscription

  • Many Arabic channels are free-to-air, allowing access without subscriptions.
  • International satellites may have encrypted channels requiring paid subscriptions.
  • Some international sports or movie channels require regional decoders or smart cards.

5. Choosing the Right Satellite

  • Decide based on your preferred content, language, and geographic location.
  • Consider combining Arabic and international satellites for a wider range of channels.
  • Use satellite tracking tools to ensure optimal dish alignment and reception quality.

Understanding the differences between Arabic and international satellites helps viewers select the best satellites for their needs, ensuring access to desired channels with optimal signal quality.

How to Identify New Satellite Frequencies Before Scanning

Staying updated with the latest satellite frequencies allows users to efficiently find and tune new channels without wasting time on trial-and-error scans. Knowing where to look ensures a smoother and faster channel setup.

1. Follow Reliable Satellite Websites

  • Use trusted sources that regularly publish updated frequency lists for various satellites.
  • Check for details such as frequency, polarization, symbol rate, and FEC for accuracy.
  • Subscribe to newsletters or feeds from satellite providers for real-time updates.

2. Use Satellite Receiver Tools

  • Many modern receivers include tools or apps to automatically fetch new transponder data.
  • Enable features like ā€œChannel Updateā€ or ā€œAuto Transponder Scanā€ for automatic detection.
  • Keep your receiver firmware up to date to support these features.

3. Monitor Official Broadcaster Announcements

  • Follow official channels or social media accounts of broadcasters for announcements of new channels.
  • Note down the frequency and other parameters as soon as they are published.

4. Use Satellite Tracking Apps

  • Satellite tracking apps help identify which satellites are active in your region.
  • They often provide real-time frequency updates and footprints for better planning.

5. Keep a Personal Frequency Log

  • Maintain a record of new frequencies you discover or plan to scan.
  • Update the log regularly to avoid scanning the same frequencies repeatedly.
  • This helps you quickly access new channels as they become available.

By proactively identifying new satellite frequencies, users can save time, avoid missing new channels, and maintain a complete and up-to-date channel lineup.

How to Efficiently Identify and Tune New Satellite Channels

Satellite channels are frequently added, updated, or moved to new frequencies. To ensure you never miss new broadcasts, it is important to know how to efficiently detect and tune newly launched channels using the correct scanning methods and proper receiver settings.

1. Verify the Latest Frequency Information

  • Always check updated frequency, polarization, and symbol rate details from reliable satellite sources.
  • Confirm the satellite orbital position (e.g., 7°W, 13°E) before scanning.
  • Incorrect parameters are the most common reason new channels are not detected.

2. Select the Appropriate Scanning Method

  • Manual Scan: Ideal when you have specific transponder details for a new channel.
  • Blind Scan: Automatically searches all active frequencies to discover newly added channels.
  • Network Scan (if available) can detect additional related transponders.

3. Optimize Dish Alignment for Weak New Signals

  • New channels sometimes broadcast with lower power during testing phases.
  • Fine-tune azimuth and elevation for maximum signal quality.
  • Adjust LNB skew slightly to improve signal reception.

4. Update Receiver Firmware

  • Ensure your receiver software supports new compression standards like DVB-S2 and HEVC.
  • Firmware updates improve compatibility with recently activated transponders.
  • Restart the receiver after updates before scanning again.

5. Organize and Manage New Channels

  • Sort newly found channels into favorites lists for easy access.
  • Delete duplicate or inactive channels after scanning.
  • Rename test channels if needed for better organization.

6. Troubleshooting if Channels Do Not Appear

  • Recheck frequency details for accuracy.
  • Confirm signal quality is stable above acceptable levels.
  • Inspect cables and LNB connections if scanning fails repeatedly.

By combining updated frequency data, proper dish alignment, and the correct scan method, users can efficiently detect and tune new satellite channels while maintaining a clean and organized channel list.

Strategies to Improve Satellite Channel Reception

Ensuring strong and stable satellite reception requires proper alignment, high-quality equipment, and regular maintenance. Following the right strategies can significantly enhance your viewing experience and reduce interruptions.

1. Optimize Dish Alignment

  • Ensure the dish is precisely pointed to the satellite’s azimuth and elevation.
  • Use signal strength and quality indicators on your receiver to fine-tune alignment.
  • Make small adjustments slowly to achieve the highest stable signal.

2. Adjust LNB Skew Angle

  • Rotate the LNB slightly to match the satellite’s polarization.
  • Proper skew adjustment reduces interference and improves signal quality.
  • Check manufacturer recommendations for your satellite and location.

3. Use High-Quality LNBs and Cables

  • Low-noise LNBs provide better signal reception, especially for weak satellites.
  • Use well-shielded coaxial cables to prevent interference and signal loss.
  • Replace old or damaged cables promptly.

4. Keep Equipment Clean and Maintained

  • Remove dust, leaves, or snow from the dish surface regularly.
  • Check for loose connections and tighten F-connectors as needed.
  • Inspect for rust or physical damage and repair when necessary.

5. Avoid Obstacles and Interference

  • Ensure there are no trees, buildings, or other obstructions blocking the line of sight to the satellite.
  • Avoid placing the dish near devices that may cause electromagnetic interference.
  • Choose an elevated location if possible to maximize signal reception.

6. Regularly Monitor and Update Settings

  • Check signal indicators periodically to detect any drop in quality.
  • Update transponder lists and receiver firmware to maintain optimal performance.
  • Re-scan channels if you notice missing or weak channels.

Implementing these strategies ensures a strong, clear, and reliable satellite signal, providing uninterrupted access to your favorite channels and high-quality viewing experience.

How to Backup and Restore Channel Lists on a Satellite Receiver

Creating a backup of your satellite receiver’s channel list is essential to avoid losing your favorite channels after a factory reset, firmware update, or system malfunction. Most modern receivers allow users to export and restore channel data quickly using USB storage.

1. Why Backing Up Your Channel List Is Important

  • Prevents loss of sorted and organized channel lists.
  • Saves time by avoiding repeated manual scanning and sorting.
  • Protects custom favorites groups and channel names.

2. How to Backup the Channel List

  • Insert a formatted USB flash drive into the receiver.
  • Go to the receiver’s Tools or System menu.
  • Select Backup or Dump to USB.
  • Choose Channel List (or ā€œUser Databaseā€).
  • Confirm and wait until the backup file is saved successfully.

3. How to Restore the Channel List

  • Insert the USB drive containing the backup file.
  • Open the Upgrade or Restore menu.
  • Select Restore from USB or Load User Database.
  • Choose the saved file and confirm the process.
  • Restart the receiver after restoration is complete.

4. Important Tips Before Restoring

  • Ensure the backup file matches your receiver model and firmware version.
  • Avoid turning off the device during backup or restore.
  • Keep multiple backups in case one file becomes corrupted.

5. Troubleshooting Common Issues

  • If the file is not detected, check USB format (FAT32 is recommended).
  • Update firmware if restore options are missing.
  • Recreate the backup if the restore process fails.

Backing up and restoring your channel list ensures a smooth viewing experience and protects your personalized setup from unexpected data loss.

How to Restore Channels After a Factory Reset

Performing a factory reset on your satellite receiver erases all saved channels, favorites, and settings. Restoring your channels correctly ensures you can continue enjoying your favorite content without starting from scratch.

1. Backup Before Reset

  • If possible, always create a backup of your channel list and settings before performing a factory reset.
  • Use a USB flash drive or the receiver’s built-in backup feature.
  • Store the backup file safely to prevent corruption or loss.

2. Perform the Factory Reset

  • Access the Settings or System menu on your receiver.
  • Select Factory Reset or Restore Default Settings.
  • Confirm the action and wait until the reset is complete.

3. Restore Channels from Backup

  • Connect your USB drive with the backup file to the receiver.
  • Use the Restore or Import Channels option in the menu.
  • Verify that all channels, favorites, and settings have been restored correctly.

4. Manual Channel Scan (If Backup Is Unavailable)

  • Use the Auto Scan or Network Scan feature to search for available channels.
  • For specific channels, perform a manual scan using the frequency, polarization, and symbol rate.
  • Save the channels after scanning and organize your favorites as needed.

5. Verify Signal and Settings

  • Check the signal strength and quality for each restored channel.
  • Adjust dish alignment or LNB skew if necessary to improve reception.
  • Ensure parental controls and other custom settings are reapplied.

By following these steps, you can quickly restore your channels after a factory reset, minimizing downtime and ensuring a seamless viewing experience.

How to Set Your Receiver for Automatic Channel Updates

Modern satellite receivers allow users to automatically update their channel list without manually scanning each transponder. This ensures you always have access to new channels and maintains a complete, organized lineup.

1. Enable Auto-Update Features

  • Go to your receiver’s Settings or System menu.
  • Look for options like Auto Channel Update, Network Scan, or Channel Refresh.
  • Turn on the feature to allow the receiver to check for new channels automatically at scheduled intervals.

2. Connect to a Satellite or Network Feed

  • Some receivers require connection to the satellite’s official network or a broadband feed for automatic updates.
  • Ensure the receiver is online if using an internet-assisted update.

3. Schedule Update Times

  • Set the update to occur at convenient times, such as overnight, to avoid interrupting viewing.
  • Check for options to update daily, weekly, or whenever a new transponder is detected.

4. Maintain Receiver Firmware

  • Keep your receiver firmware up to date to support automatic updates.
  • Check manufacturer notifications for compatibility with the latest transponder changes.

5. Verify Updated Channels

  • After the auto-update runs, review your channel list to ensure new channels are added correctly.
  • Organize favorites and remove duplicates or inactive channels if necessary.

By enabling automatic channel updates, you save time, avoid missing newly launched channels, and ensure your receiver maintains a fully updated, organized lineup without manual intervention.

Leave a Reply

Your email address will not be published. Required fields are marked *

Back to top button